
[HowTo] Change User Model Namespace in Laravel
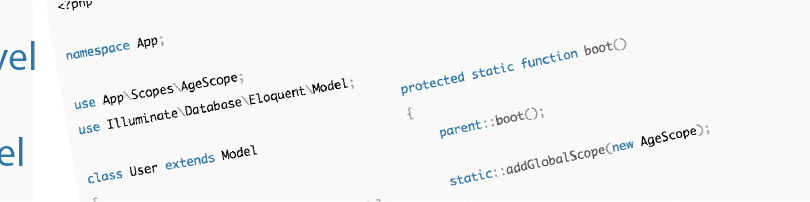
By default Laravel’s “User” model is place on “App” namespace. To move it to App\Models namespace we have to do the following: Move User.php to App\Models folder Update this path in config/app.php Search for “providers” key and update the path in “model” before : App\User::class, after: App\Models\User::class Generate new class path by using composer dump-autoload … Continue reading “[HowTo] Change User Model Namespace in Laravel” →